
HIGHLIGHTS –
• Is App Me full Size Video Edit Kar Sakte Hai
• Multiple Layer Add Kar Sakte Hai Video Me
• Slow motion Add Kar Sakte Hai
Step – 1

Jaise hi aap is application ko open Karenge to aapke Samne Kuch Is Tarah Se interface dekhne ko Milega Jahan per aapko home, tutorials, Plus ka Icon, project aur element dekhne ko Milega aur aap ko Iske andar edit karna hai video to Yahan per Plus ke icon par click kijiye.
Step – 2
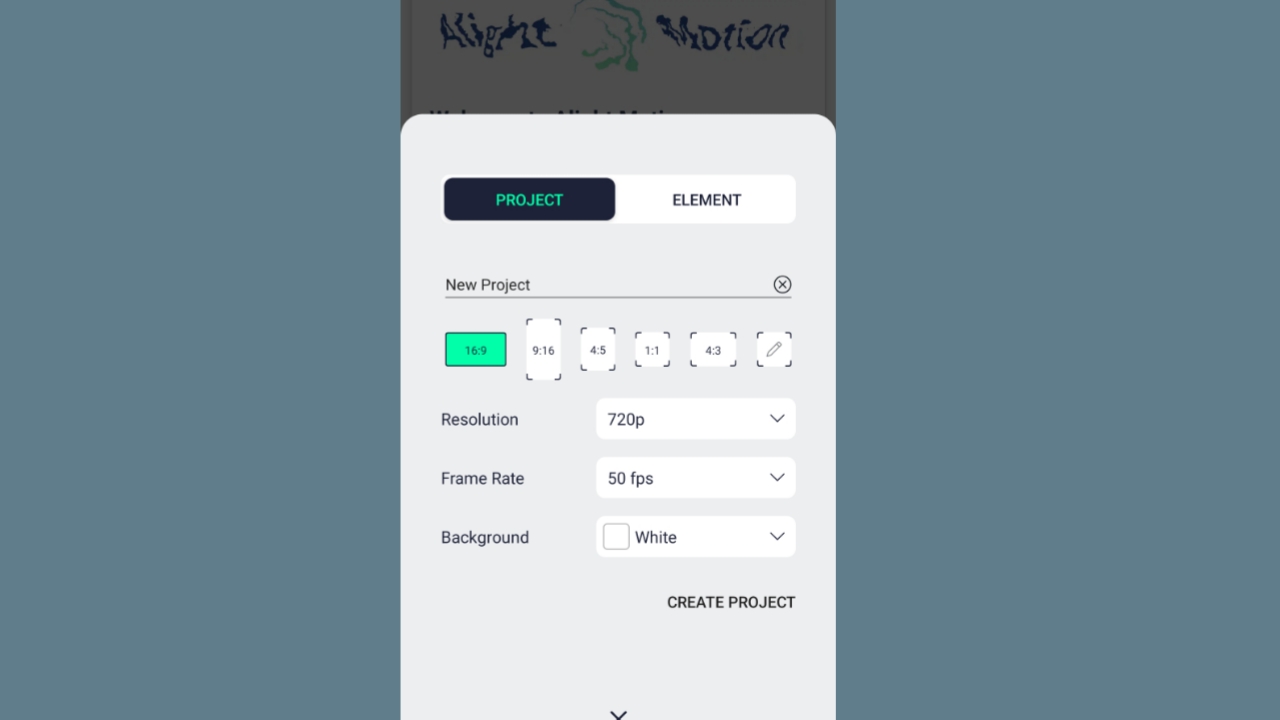
Fir is ke bad aapko Yahan per project aur element dikh ko Milega Agar aapko project select Karte Hain To Yahan per aapko Apne project ka name dalna hai fir is ke bad Aap Jo Bhi Screen select karna chahte hai. Jese ki full size chahie yah Yahan per ya cinematic screen hai vah select karna chahte to Vah select kar sakte FIR uske baad Resolution select kar sakte hain frame rate, background wo sub select Kar Ke Yahin per aap create project par click kijiye.
Step – 3
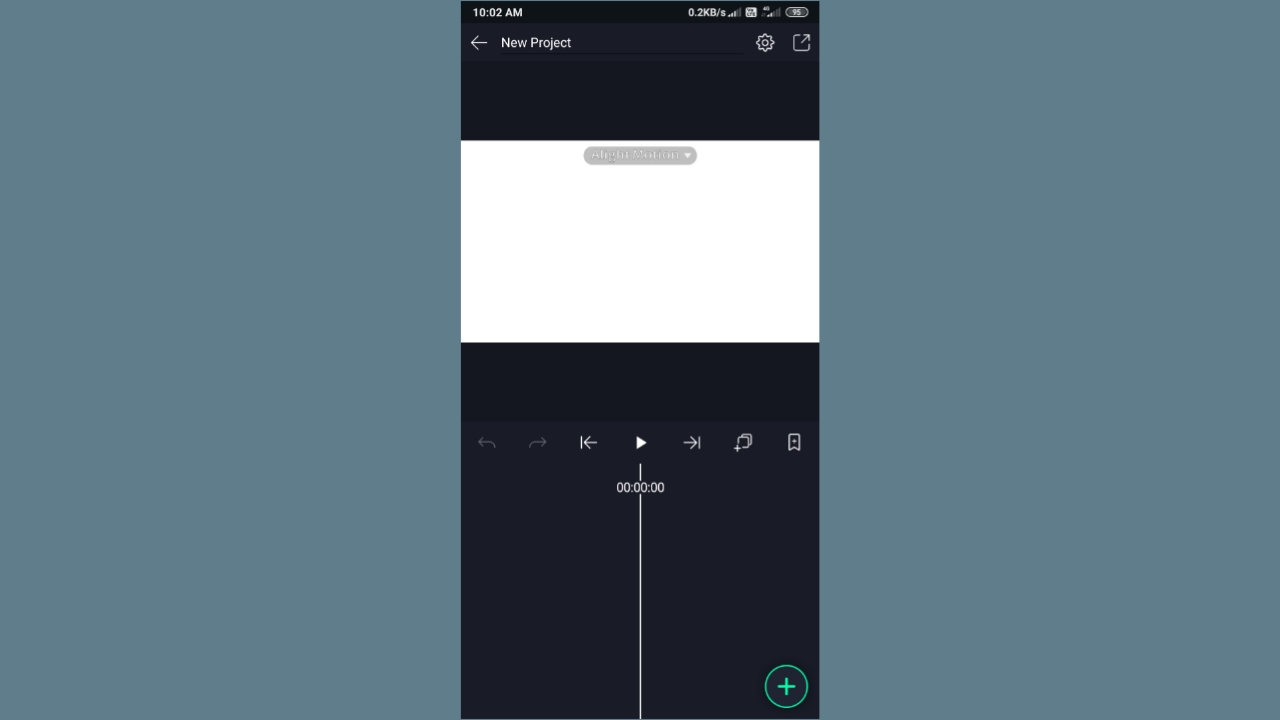
Aus ke baad Yahan per video edit karne ke liye Deskbord dekhne Ko Mil Jayega To Yahan per simpal sa sabse pahle aapko + ke icon Pe click Karke aapko video ya photo select karna hai jo bhi aap Yahan per video edit karna chahte hai ya koi bhi background select Karna hai To wo bhi Select kar sakte hai.
Step – 4
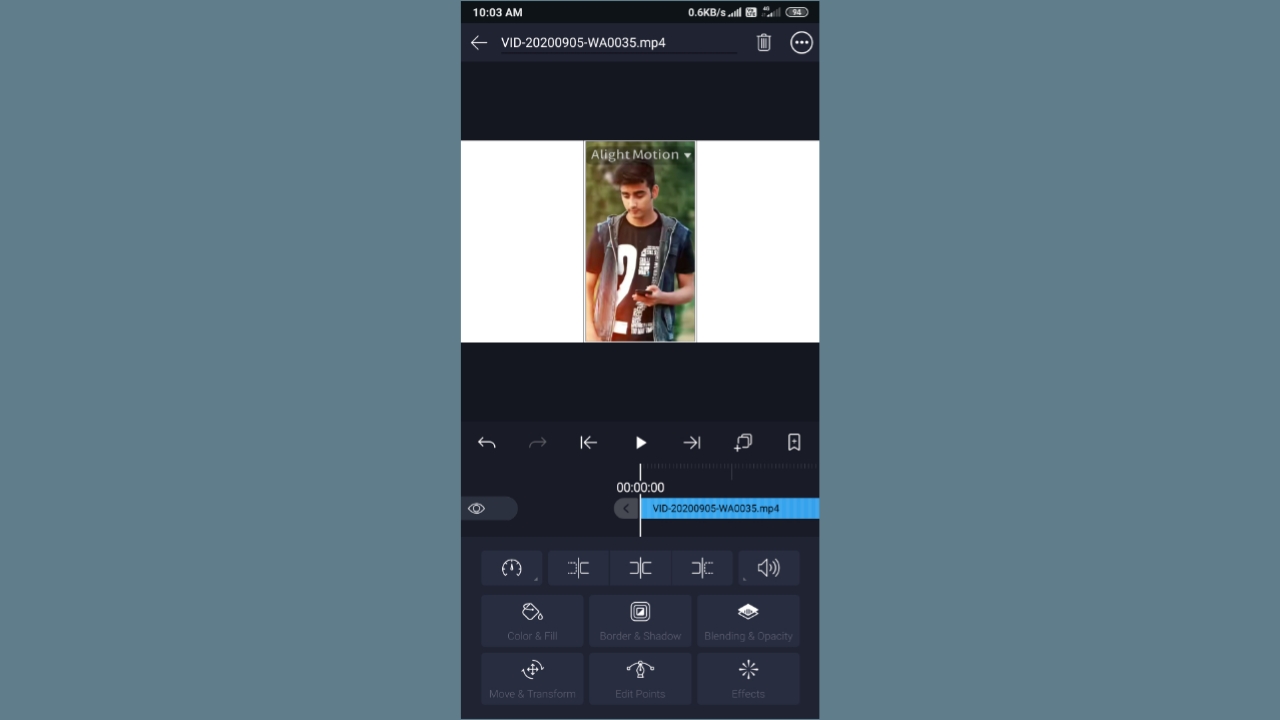
Photo ya video select karne ke bad Yahan per aapko Jaise leyer pe click Karenge to aapko bahut Sare option dekhne ko Milega Jise ki speed control kar sakte hai, Aage Piche video ko cut kar sakte hai, volume Jyada yah down kar sakte hai, Iske andar color & fill kar sakte hai, border aur Shadow Dal sakte hai, blending effect vah Sab Yahan per aapko Sare option dekhne Ko Mil Jayega FIR Uske bad agar aap Iske andar koi bhi leyer Lena Chahte to Plus ke icon pe click Karenge to aapko jo bhi photo ya video select kar sakte hai.
Step – 5
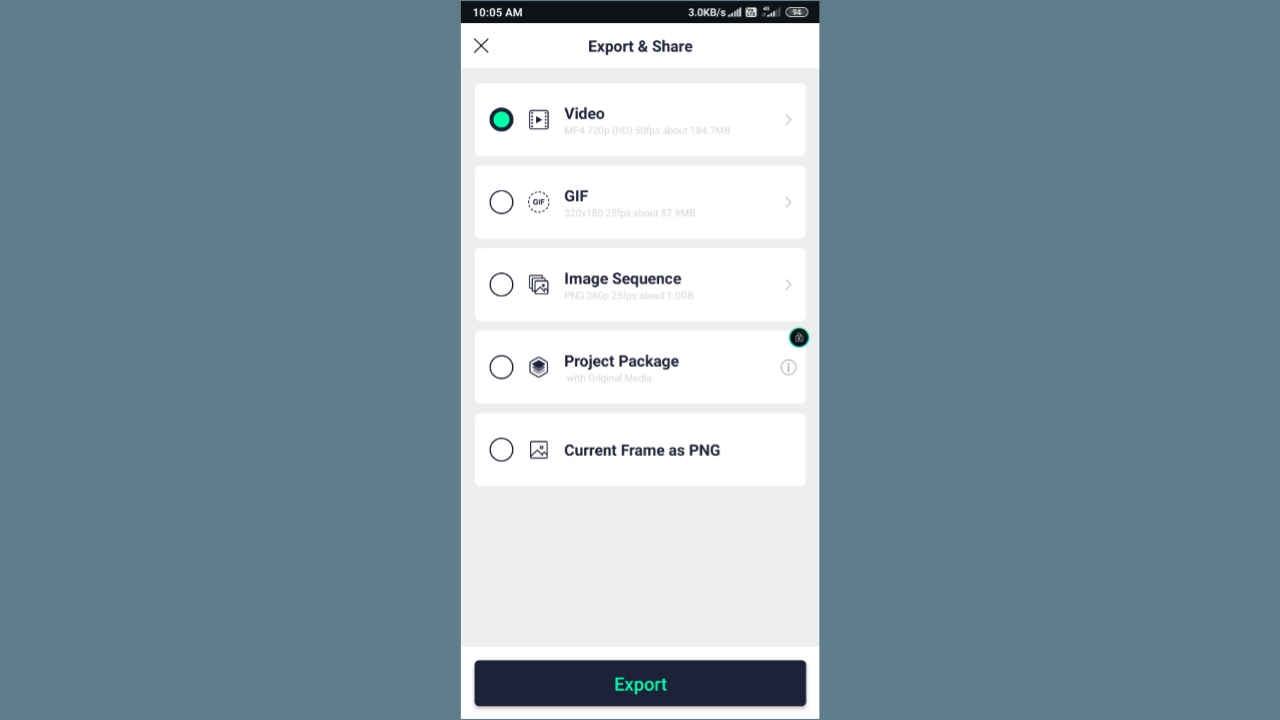
Free video edit hone ke bad agar aap isko save karna chahte to simple se export per click Karenge to Yahan Par dekh sakte hain is edit video ko Video me, GIP me, Images Sequence me aur Current Frame as PNG me Save kar Sakte hai aur export Par click kar dena hai.
Step – 6
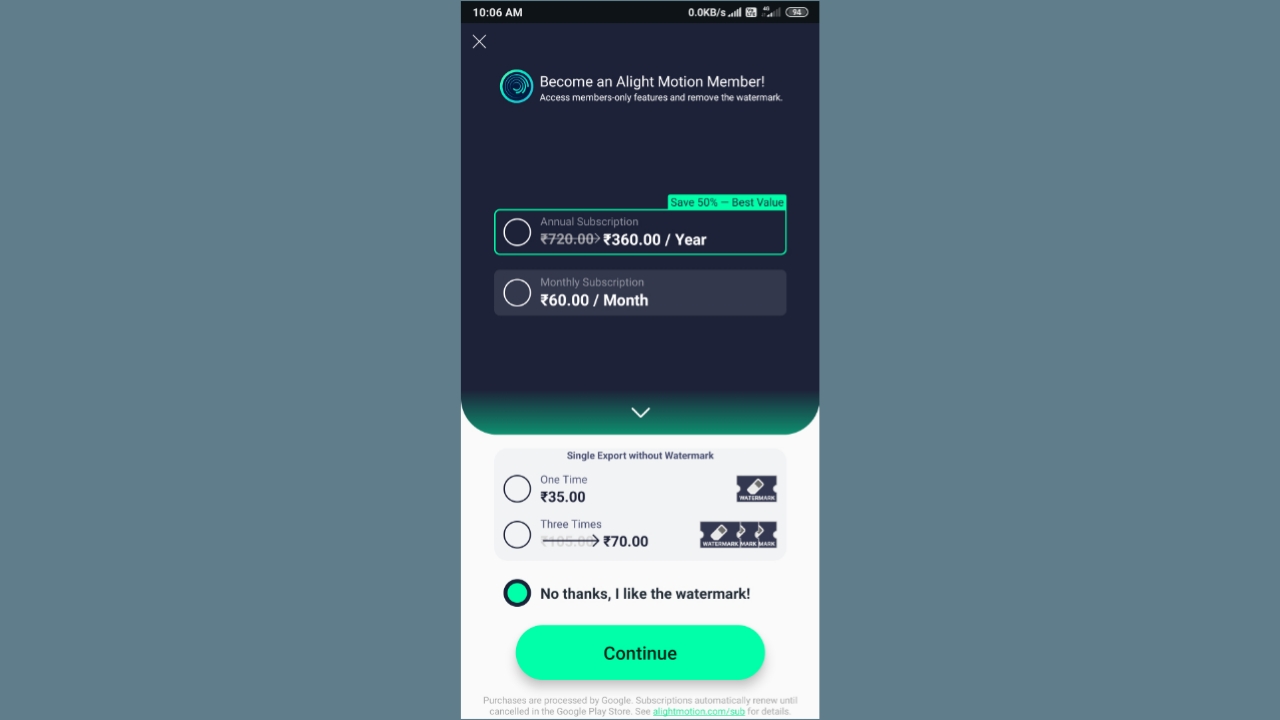
Fir aapke Samne Kuch Is Tarah Se popup dekhne ko Milega any ki Iske andar Agar aapko watermark Nahin chahie to aapko Yahan per Kuchh pay karna padega yani ki Yahan per agar aap Bina watermark Chahte Hain To aapko Yahan per paid version purchase karna padega tabhi aapko watermark Nahin Milega otherwise agar aap usko free use karna chahte hai to aapko Yahan per watermark dekhne ko Milega To Yahan per no thanks I like to watermark per click Karke niche continue par click karke Aapka yah video export Hona start ho jaega aur apne file ke andar save ho jaega.


Pls light mation
Nice app
Ashish
Стало время подключить прочный стабилизатор напряжения
стабилизаторы напряжения http://stabrov.ru.